X
Introduction
Nowadays, many of us do our shopping online. As a small business owner, I’m incredibly grateful to be able to connect with people all across the country (and potentially the globe!) who love my work. It’s an incredible feeling to know that someone thousands of miles away was able to find me online and fall in love with my pieces. The one downside that I’ve encountered is that many customers feel a lot of anxiety around selecting the right ring size. It’s only natural - you want your ring to fit right!
Fortunately, sizing your finger is easier than you think. Over the years, I’ve developed some tried-and-true methods to get your ring size right the first time. So take a deep breath and read on!

How Should a Ring Fit?
First and foremost, your ring should fit comfortably on your finger without sliding around. Ideally, it will be able to easily slide over your knuckle, but there should still be some resistance. It should not feel like it’s going to slip over your knuckle and fall off, but it should also not be uncomfortably tight, pinch, or feel claustrophobic.
The most common ring sizes for women are between 5-8, although they can run anywhere from 3-13. I’ve truly done them all at this point! Men’s rings run from size 6-13, with 9 being the average size. Keep in mind that fingers do swell. Your ring might feel a little tight if it’s a hot day or after a salty meal, but it should never feel so tight that it’s painful.
Finding Your Ring Size
There are three simple methods that I recommend using to find your ring size.

1. Measure a ring that already fits.
It’s very likely that you have at least one ring in your collection that fits you. Make sure that it’s a ring you wear on the same finger that you plan on wearing your new ring. (This might seem like a no-brainer, but different fingers are different sizes.) When measuring this ring, you want to measure the inside diameter, not the outside diameter.
Use a ruler or tape measure to measure straight across the inside of the ring in millimeters. Obviously, you want to measure the whole diameter, so make sure you go across the middle of the ring. I recommend measuring 2-3 times just to double-check that you’re getting it right. Then, use this simple reference chart to determine your ring size.
If your perfect fit happens to fall between two sizes, I recommend using the larger size. Remember those swollen fingers

2. Order a Ring Sizer
If all that marking and measuring stresses you out, don’t worry. I have an even easier solution! For just $5.00, I will send you your own ring sizer so you can try on different sizes at home and determine which one feels best. Even better, I will credit the cost of your ring sizer toward the cost of your ring. So it’s basically free! Send me a message and I'll make it happen!

3. Let an Expert Handle It
Still nervous about finding your own ring size? Not a problem. Probably the easiest and most accurate way to get your ring size is to be measured in-person by a local jeweler. Virtually any jeweler will measure your finger for free. Just walk on in and ask!

Resizing Rings
In a perfect world, everyone would get their ring size exactly right on the very first try. But, as they say in the South, stuff happens. Fortunately, I offer complimentary resizing on all my rings for the first three months after purchasing. The only thing you have to cover is shipping. So, whether you bought the ring as a gift or accidentally chose the wrong size for yourself, don’t stress. I got you!
There is one caveat to this: if you choose to take the ring to another jeweler for resizing, my warranty is voided. All of my jewelry is completely handmade using traditional crafting methods, and not everyone makes their jewelry the same way. Unfortunately, I’ve seen other jewelers make errors that I’m not able to fix. So if you want to take your ring to someone else for sizing, proceed with caution. That said, remember that the first resizing is free and I know my jewelry better than anyone, so there’s no reason not to send it right to me!
Sizing Rings for Stacking
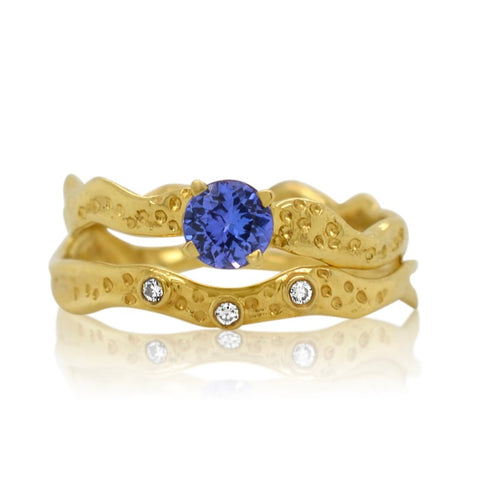
Much of my jewelry is designed for layering and stacking. While this is my favorite way to play with jewelry, it does make sizing a tad more complicated. But not to worry - I’ve got your back! (Or should I say, your finger!)
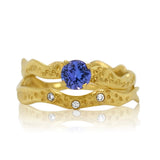
Generally speaking, if you’re planning on stacking a ring (or if the ring has a particularly wide band) it’s helpful to buy ½ size up. But you don’t have to worry about that. Just find your “true size” and let me know if you’re planning on stacking the ring. There will be a place in the order notes when you make your purchase to share this information. Then, I will handle selecting the best size for you. No sweat!
Do’s and Don’ts
Here are a few extra tips for finding your ideal ring size!
- Do - Use a ring sizer.
- Don’t - Use string to measure your finger.
Some people advise tying a piece of string around your finger and measuring the length of that string, but I find this leads to all kinds of problems. String adjusts to your finger differently than metal and often results in a ring being too loose or too tight.
- Do - Consider the shape of your finger
- Don’t - Choose a size larger than your knuckle.
If the base of your finger is wider than your knuckle, you’ll want a ring that fits a little more snugly, so it doesn’t slip off.
- Do - Measure your finger between lunch and dinner.
- Don’t - Measure on a very hot day or right after a salty meal.
Factors such as heat and salt can make your fingers swell. It’s best to measure at a comfortable temperature and between meals. This will get closer to your average finger size.
That’s it! I hope this guide answered all your burning questions about ring sizing, but if you have lingering concerns, please don’t hesitate to reach out. You can also leave your questions in the comments section. Happy ring shopping!

